Using widgets
Let's take a closer look at how to write the main module of a dapplet, what it consists of, how to add a widget, and how to use some Core API methods.
Here is the initial code for this example: ex01-add-button-exercise.
The basic template for your_dapplet/src/index.ts looks like this:
The dapplet injects a button to every Tweet on a Twitter page. This button is displayed below the main content, near the buttons Like, Retweet etc. The function passed to POST takes ctx and returns the widget, the array of widgets or null.
ctx - is an object that contains parameters of the current context where the dapplet widgets were injected. Parameters are defined by the adapter.
or
Before using the button or/and other widgets in this.adapter.attachConfig() it has to be received
from this.adapter.exports.
Our button has only one state - DEFAULT. In this case you can choose not to set the initial state and delete this field.
When you don’t have the DEFAULT state you have to set the initial state as above.
The label, img and exec are defined in the state. In this case exec takes the function that will be executed with a
button click.
The whole list of widgets and contexts is defined in the adapter. The twitter-config API can be found here.
Let’s add a counter to the button label in POST to show how we can manipulate the widget’s state.
Add a label with a counter.
Listen for the button click - output into console.
The extension provides exec function with two parameters:
- ctx — the current parsed context;
- me — a Proxy of the widget.
We got the ctx object earlier so in our example we don't need to get it here.
Using me we can change the widget's parameters and its state.
Increase the counter value on the button click.
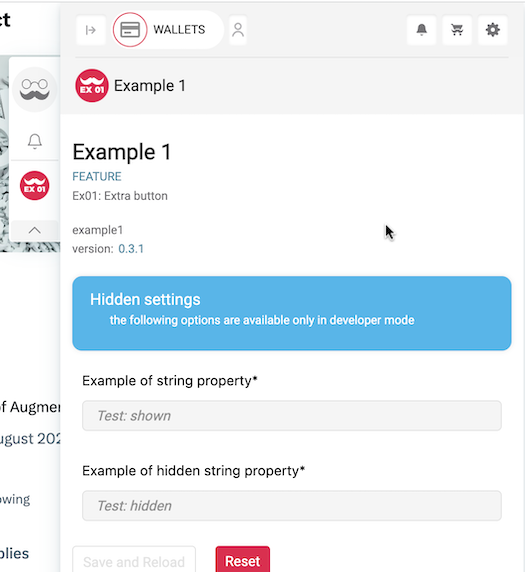
Let's display a message in the browser alert by clicking on the widget. We will also give an opportunity to customize the message text in the extension’s dapplet settings.
The dapplet settings are as follows:
To do this, add the following code to the dapplet's exec:
Here is the complete exec code:
In the config/default.json define your own defaults.
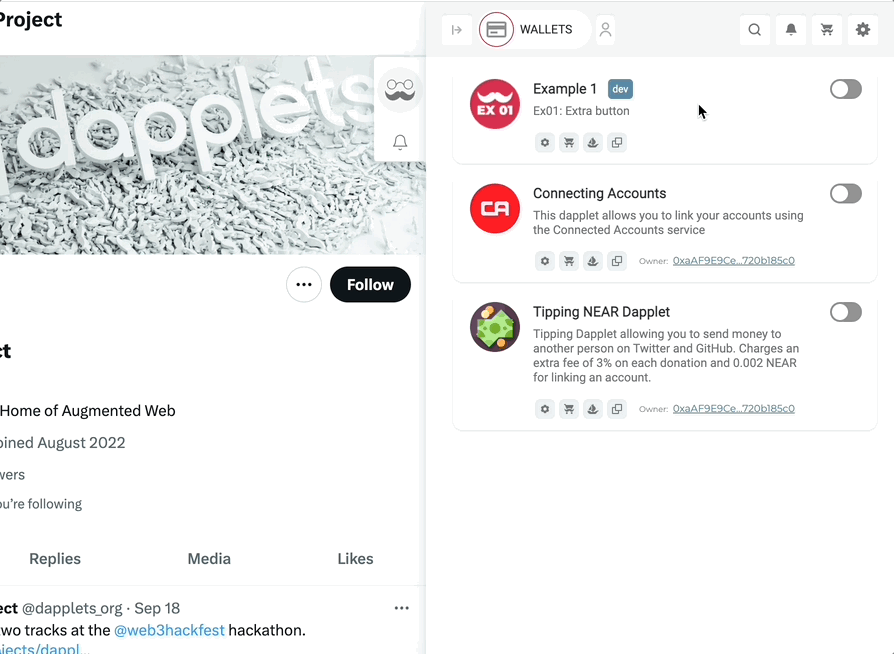
Run the dapplet in your terminal
If you don't know how to run the dapplet in a browser, see Get Started.
Here is the result code of the example: ex01-add-button-solution
In the browser:
If you want to save counters' values and get them from the server, look at Server Connection.