Run Your Dapplet
The Dapplets Project team provides a number of tools that make creating a new dapplet quick and easy. Unlike building a browser extension from scratch, in just a few minutes a developer can create a dapplet that inserts an action button in a specific place on the site, easily configure interaction with blockchain wallets, add interaction with smart contracts or a classic backend, and much more.
To run a basic dapplet, follow these steps.
1. Choose the environment to start the project. There are three ways:#
1.1. Run the dapplet using Gitpod. It is the easiest way to launch the remotely located dapplet into the web-browser and try to work with it:

Gitpod can provide fully initialized, perfectly set-up developer environments for any kind of software project. More about Gitpod you can find on its official website.
1.2. Create Dapplet App is the best way to start building your own dapplet.
To create a local project, run:
This method is currently the most advanced and allows you to flexibly configure your project. You can immediately select the type of project, add an adapter, overlay or server to the dapplet.
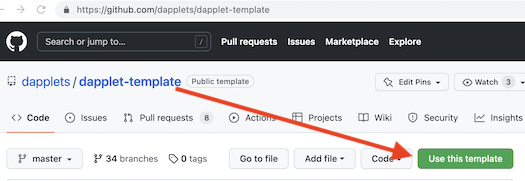
1.3. You can use Dapplet Template as a template for your GitHub repository.
Use the button on the project page:
2. Change the module name from "dapplet-template.dapplet-base.eth" to your own one in the package.json file.#
3. Fill in the fields in the following manifests: package.json and dapplet.json.#
In package.json set the name, version, description, author and license for your dapp.
The name is the ID of your dapplet so it must be unique.
In dapplet.json set the title.
This second manifest is required to deploy the dapplet and add it to the dapplet registry.
You can find more information about the dapplet manifest here.
4. Change the icons to your own ones in the src/icons folder.#
The icon src/dapplet-icon.png is used for the injected button in source code src/index.ts and for display in the Dapplets store. The link to this icon is defined in the dapplet.json manifest.
5. Edit the necessary Dapplet settings in the config/schema.json file.#
The default setting values are defined in the config/default.json file.
The schema follows the rules defined in http://json-schema.org/.
The Dapplet settings UI is generated by react-jsonschema-form.
There are three environments:
dev– used when a module is loaded from the development server;test– used when a module is loaded from the Test Dapplet Registry;prod– used when a module is loaded from the Production Dapplet Registry;
More about Dapplet Config.
6. You can use another Adapter in your Dapplet.#
Dependencies are defined in the dependencies section of the dapplet.json file and are injected in the dapplet's index.ts file.
The Twitter adapter is used by default.
Here is our list of adapters available at the moment:
- twitter-config.dapplet-base.eth – site-specific adapter for Twitter;
- github-config.dapplet-base.eth – site-specific adapter for GitHub;
- social-virtual-config.dapplet-base.eth – Virtual config for social networks;
- common-config.dapplet-base.eth – universal parser config for Web.
7. Fill in the contextIds section of the dapplet.json file.#
ContextId is an identifier of a context to which your module is bound. This is usually the same as the name of an adapter you are using. It may be:
- the name of an adapter you depend on (e.g.
twitter-config.dapplet-base.eth); - the domain name of a website that your dapplet will run on (e.g.
twitter.com); - the identifier of a dynamic context (e.g.
twitter.com/1346093004537425927).
8. Specify the argument of @Inject decorator with the chosen adapter in the /src/index.ts module and add the activate() method with a simple dapplet code.#
9. Install dependencies and run the code:#
You will see a message like this:
In this example we use a Rollup bundler to compile modules but you can use whatever you want. Webpack for example.
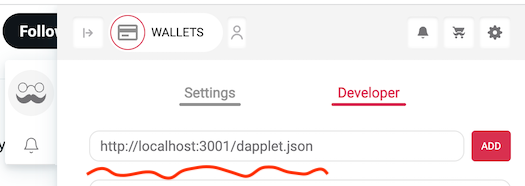
The address http://localhost:3001/dapplet.json is a link to your dapplet manifest file. Copy it to a clipboard.
10. Connect the development server to the Dapplets Extension.#
Paste the URL to the Developer tab of the Dapplet Extension's popup and click Add.
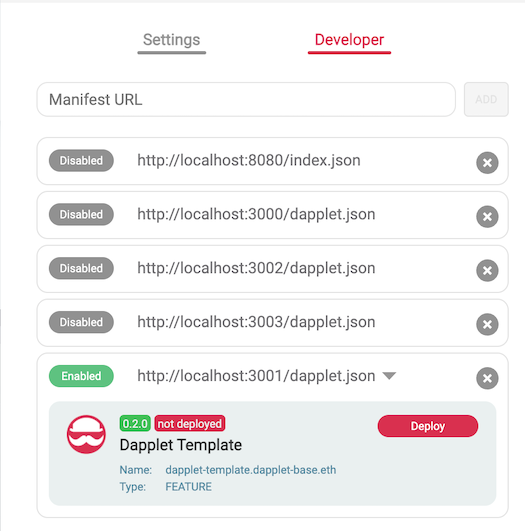
If an error occurs, look here.
You will see your module in the list of development modules. Here you can start the deployment process.
11. Run your dapplet on the website.#
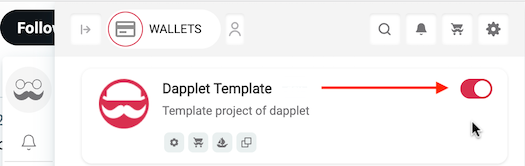
Here is an example:#